Failing by privacy statement in Windows Store

The first time I submitted an app to Windows Store, it got failed by privacy settings. In the guide lines that were provided, it was stated that if any data about the user is saved or shared, a privacy statement was neded. We didn’t save or share any user data but we added a privacy statement in the app before submitting but it got failed anyway. We got a bit confused but found out that we also needed a link to the privacy statement in the store (see picture below), and that the reason that we needed the privacy statement was because we used the internet connection. The guide lines are now updated with this information, see 4.1.1 in Windows Store certification guide lines.

So before submitting your app, if you are using the internet connection or have that capability set in the app manifest, don’t forget to submit a privacy statement – both in the app and in the store as well!
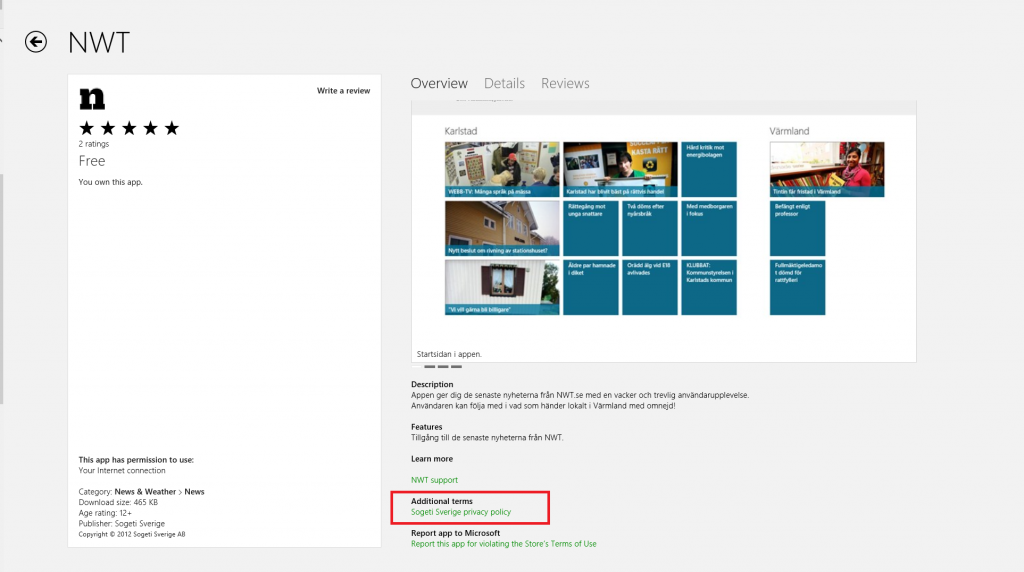
Privacy policy for app
Click on Picture for larger version.

Windows 8 Developer Camp

Do you want to get started developing for Windows 8, or is just curious about the what will come?
Did you miss the opportunity to go to Windows 8 Development Camps?
Then check this link out;
http://www.microsoft.com/en-us/download/details.aspx?id=29854

There you can download presentations and hands on labs from the Development Camps. Downloads are provided both for C#/XAML and for HTML/CSS/Javascript.

Change theme when developing a Metro app

When creating a Metro-app for Windows 8, you as a developer can choose to use a light or dark theme for the application. For those of you that have previously developed for Windows Phone 7, this is nothing new.

The theme is predefined and when you are using Dark (which is default by the way), the background will be dark and text and so on will be set to light colors. When using the Light theme it is the other way around. You can of course customize everything.

So how do you change from Dark to Light theme for the app?
Here follows one simple example of how to do this.

First, locate your App.xaml-file in your solution. It will be in the root of your project. Open the code behind section and locate the constructor. Then add this line for light theme;
App.Current.RequestedTheme = ApplicationTheme.Light;
or for dark theme use;
App.Current.RequestedTheme = ApplicationTheme.Dark;

The result should now look like:
[sourcecode language=”csharp”]
public App()
{
this.InitializeComponent();
//The following line changes the theme for the application. Use ApplicationTheme.Dark for dark theme.
App.Current.RequestedTheme = ApplicationTheme.Light;
this.Suspending += OnSuspending;
}
[/sourcecode]